Friday, August 24, 2012

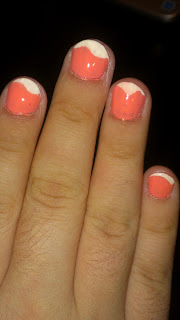
Funky French Nails

0 Comments


I'm not really big on doing my nails, but I was ridiculously bored and decided to do them.  I didn't really feel like having plain jane nails so I racked my brain for something to do.  When I say racking my brain, I really mean searching on Pinterest.  :)

I came across a bunch of different ideas but didn't really like any of them too much.  Either they seemed too complicated or they just weren't for me.

Then, it happened!  An idea!  It felt like a light bulb going on in my head.  FUNKY FRENCH!  It was a simple enough idea and I had everything I needed so I just went for it.

Here's a tutorial for those of you who'd like to give this a try.


Funky French Nails:
Step One - Gather everything you need.  You'll need:  Two colors of nail polish, scotch tape, clean nails and funky scissors.  My pair of scissors are called 'Paper Shapers' and you can find them in any craft store.

Step Two - Paint your nails with your base color and allow to completely dry.  (You'll see why in a little bit.)  The color I used is Essie 'Haute as Hello'.

Step Three - Cut out strips of scotch tape with the scissors.

Step Four - Place the tape you cut out on top of your base coat then paint the tip of your nail with your second nail polish color.  I used white.  Before you do this make sure your base color is completely dry or else you'll ruin your nail like I did.

Step Five - Repeat the process until you finish all of your nails.  I'm pretty happy with my outcome.  I'm going to make sure the house isn't so humid next time.  It took my nails forever to dry and I messed up a few of them.

Happy painting.


Thursday, August 23, 2012

Color Palette #1 - Ocean Waves

0 Comments


I've been seeing a lot of color palettes on Pinterest.  My Mom is moving into a new home in a few weeks so we've been doing a lot of paint searching.  This palette that I pinned actually has two colors very similar to the ones my Mom chose.  Small world huh?!

Because I like to re-do things I see on Pinterest I thought I'd give my own palette a try.  It was actually pretty fun and I've decided to keep this as an on going thing!  So make sure to check the blog in a near future for another palette!


Okay, so here's my palette!  What do you think?  The picture itself is so amazing and just choosing a few colors does not do it justice.


DIY Hair Chalking - My very own tutorial!

0 Comments


This is my very first tutorial!  I'd been seeing Hair Chalking on Pinterest for a while now.  I read through some tutorials and thought that they made the process seem WAY too easy, because in reality, it isn't.

First, it's very time consuming.  My niece's hair took me 3 hours.  Second, it's a huge mess, and I mean huge.  I've got photo evidence to prove it.  Third, it leaves your hair feeling absolutely terrible.  It's completely knotty and sticky and even after setting the chalk with your straighter it comes off on your hand.

Well folks, don't say I didn't try and warn ya!  If you still want to give this process a try keep reading.  If not, browse my blog or Pinterest and find another DIY project to embark on!  My next project:  An Adirondack Stool!  But that won't be making an appearance on the blog for a longgg while.  And who knows if it'll stay standing long enough for a few photos to be taken.  Haha.

Okay, so if you're ready to get started these are the items you'll need!


  1. A spray bottle filled with warm water.
  2. Soft pastel chalk.  Do NOT get Crayola or regular chalk, it will not work.  (I got a huge 24 pack at Michael's for $4.99 not including my 40% off coupon)
  3. A towel to wrap around your neck.
  4. Gloves if you don't want your hands to dye.
  5. A hair straightener or curler.
  6. Blow dryer - This is optional for people who are time crunched!


 Step One - Place a towel around your neck and spray the strands of hair you want to chalk.  I sprayed my niece's entire head and then realized I shouldn't have.  By the time I got to the strands I wanted to chalk the hair was too dry.  Wet your strands in 1 to 2 inch sections for best results.


Step Two - Pick your chalk colors.  I chose 4 different colors.  Light blue, dark blue, light purple and dark purple.  Take your 1 to 2 inch sections and rub the chalk on the wet hair until you can see the color.  Don't be afraid to REALLY get it in there.  Continue this step until your finish the entire head or strands you want done.

Step Three - Allow the hair to dry completely!  Do not go to the next step until your hair is absolutely dry.  This took over an hour for me, but I had her sitting under a fan and didn't blow dry.

Tip:  If you're crunched for time, you can blow dry your hair.


Step Four - This is the worst step, the heat setting.  It takes very long and is very messy as you can see by the above photos.  Do it somewhere where the mess can be easily cleaned.  Take your straightener and go over every single strand of chalked hair.  This is what will set your chalking to your hair.


Step Five - Do your clean up and marvel at your newly colored hair.  My niece's hair chalking washed out the next day.  I don't know if it's because her hair is colored, or if that's just how long it lasts.

Warnings:
  • If you brush your hair the color will come out and will also stain your brush.
  • This process really dries out your hair so once the color has come out make sure to deep condition.
  • If you are leaving your hair chalking in over night please be advised that probably will stain your pillowcase.
  • It works best on second day hair, though doing it to just washed hair won't matter too much.


Well I wish you luck.  And please let me know if you have more success at this than I did.  If you have any tips, please leave me a comment!


Thursday, August 16, 2012

One Sided Braid

0 Comments

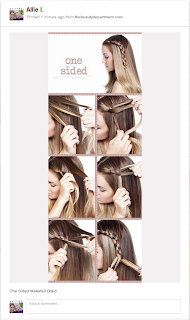
One Sided Braid


I found this step by step on The Beauty Department's website and pinned it.  It seemed fairly simple so I decided to give it a go.

I don't know if it's just me, or if it's because I'm a lefty, but at first I had a little trouble getting this braid down.  I kept taking from the bottom instead of taking just from the top.  Once I got it all down though, the braid looked stunning.  If you don't have time for an extravagant do, this one takes less than five minutes and looks super cute.  This braid is also amazing if you have bangs that you just want out off of your forehead.  Here's a bummer though:  If you've got layers, you'll have some hair that just won't catch into the braid.  I'm not sure on how to fix that.

I didn't have anyone with me while I was doing my braid so I wasn't able to get step by step pictures.  Instead I'm going to try and break it down for you in words and try and make The Beauty Department's instructions a little clearer.  Here it goes!

  1. Part your hair to the side.  With this braid, you'll want a heavier side, I'm not too sure how it'll look with a center part.
  2. Grab a small section of hair near your forehead and separate into three strands.
  3. Start off the braid like you would any french or inside-out french braid.  I did the inside-out french.  I wanted the braid to look more present.
  4. Your next step is to add a piece of hair from the top part of your head, just like you would in a french braid.
  5. Now, instead of taking a piece of hair from the bottom, skip that step entirely and keep braiding until you reach the top of your head again.  Take a piece of hair from the top.
  6. As you go further back on your head, let the braid come lower towards your ear.  You can do this by not pulling as tightly as your braiding.
  7. Continue this until you reach your ear, or as far back as you'd like.  I continued a little further.
  8. Once you've reached your stopping point braid the remaining strands of hair like a normal braid.
  9. Finish the braid with an elastic and tada!  Easy 5 minute hair do.

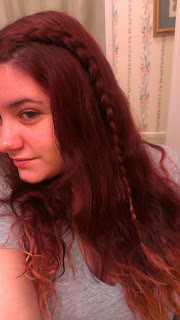
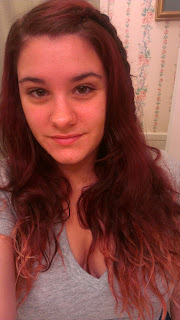
Here's what mine looked like after I was finished:

One Sided BraidOne Sided Braid

I didn't really feel like having my hair down today, being that it's almost 90 degrees and I'll be heading out in my car with NO A/C.  So I just took all my hair and braided it off to the side.  It looked pretty cool with the previous braid intertwined in it.


S'mores Cupcakes

0 Comments

S'mores Cupcakes


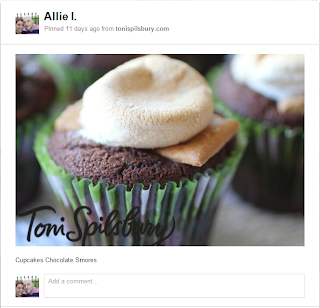
I found this picture pinned about two weeks ago.  It's a picture of a S'mores cupcake and I thought I'd try to make one myself.

I followed my standard recipe that I do for all my cupcakes and cakes, but sadly, the fiance won't let me share it!  He says it's going to the grave with me. Maybe one day I'll convince him to let me share, but for now I'll just give you a few hints and tips.

Recently I started making crusts for my cupcakes.  A crust you ask?  Yes, a crust!  It gives the bottom of the cupcake an amazing crunch factor, and it is a pleasant surprise compared to a traditional cupcake.  For this specific cupcake I used a graham cracker crust!  See where I'm going with this?!  S'mores... graham crackers... You get it!

Here is the recipe I used:

  • One sleeve of graham crackers, crushed very small
  • 1 stick of melted butter
  • 1/2 cup of sugar
Take those three ingredients and mix them together until it looks like wet sand.  Place about a tablespoon on the bottom of each cupcake liner and press down with a spoon.  Place the batter on top and bake.

I took a few pictures of my process, so here we go!

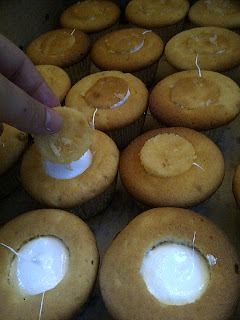
Step One - Once the cupcakes are baked and cooled, plunge a hole in the middle of the cupcake.  To make mine, I used a cupcake plunger.  It makes my life so much easier.

Step Two - With kitchen sheers, take the pieces that you just removed from the cupcake and cut off some cake leaving the top intact.

Step Three - Fill the middle with fluff or any marshmallow filling.

Step Four - Replace the tops.

Step Five - Top with your choice of chocolate frosting.  Top with a toasted marshmallow for presentation.

Chocolate Frosting:
  • 1/2 cup (1 stick) butter or margarine
  • 2/3 cup HERSHEY'S Cocoa
  • 3 cups powdered sugar
  • 1/3 cup milk
  • 1 teaspoon vanilla extract
Melt butter.  Stir in cocoa.  Alternately add powdered sugar and milk, beating to spreading consistency.  Stir in vanilla.  Additional milk can be added if you want it to be a bit thinner.  This recipe doesn't make enough frosting to make it look nice.  It's enough to do the typical spreading with a butter knife method.  

Hope you find my post helpful!


Wednesday, August 15, 2012

DIY Ombre Hair!

0 Comments


DIY Ombre Hair


Ebates - Make Money

I'm one of those girls who wears no make up and literally shoves her hair in a bun everyday, and that's my look.  I'm tired of it!  I have no talent what so ever when it comes to make up, so I decided I'd start with my hair.

For a few months, I was rockin' super red tresses and I adored it.
My family and friends... not so much.  They were sick of it, so I went back to my boring Medium Ash Brown.  Since I've always had funky hair, I decided I wanted something more than mud brown hair.  I started looking on Pinterest and came across a pin for DIY Ombre Hair from Socapricious.  I thought 'Why the hell not' and went for it.

I ran to Rite-Aid, and that was my first mistake.  They didn't have any bleaching kits, so I went for the next best thing:  A highlighting kit.  I got Revlon Frost & Glow for Medium to Dark brown hair.  Bonus:  It was on sale for $5.99!  So, if the whole thing went bad, I'd only be losing out on 6 bucks and I was in need of a trim anyways.

My second mistake:  Thinking I could pull it off on my own.  It's a bit tricky to do it to yourself... You can't tell if you're doing it even, applying enough dye, etc.  So, being the adult that I am, I asked Mommy for help.  :)  She wasn't too pleased, but did it for her darling daughter anyway.  She actually did an AMAZING job.  It came out great and I really, really love it.

Here are my results.  Tell me what you think!


Saturday, August 11, 2012

'Naughty' Donuts!

0 Comments


Ebates - Make Money!

I found this pin about 2 weeks ago.  My fiance just lovesss sweets, so I thought I'd surprise him one night and tell him we were making donuts.  He was super thrilled and we ran to the store to get the ONLY ingredient we needed:  Philsbury Grands! Buttermilk Style Biscuits.

The blog I got the Pin from is Little Bit Funky and after reading a few posts from her blog, I was crackin' up.  She called these donuts "Naughty Donuts" saying that "they are WAY too easy for the amount of amazing that they taste."  And she WASN'T kidding.  Once finished, these bad boys are ri-dic-u-lous!

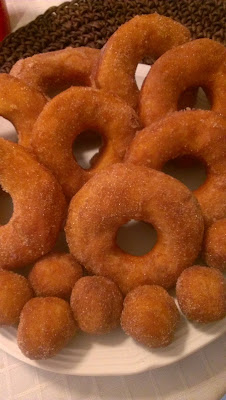
Just a hint:  Don't leave these out on the counter if you want to save theme for yourself.  They go REALLY fast, I mean... crazy fast.  Oh and the donut-holes, they'll be gone before you're even done covering in the cinnamon-sugar.

Little Bit Funky doesn't have many pictures of the process, so I thought I'd take some extra and post it for you guys.  The only hard part about making these is deciding what to do with the left over oil.  Maybe I'll make some rice balls....

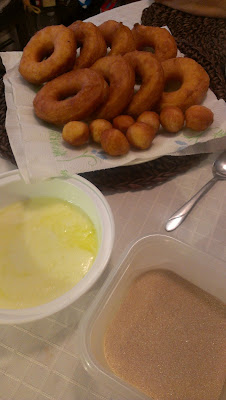
Naughty Donuts
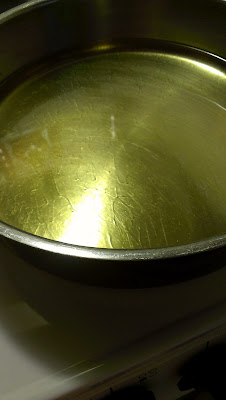
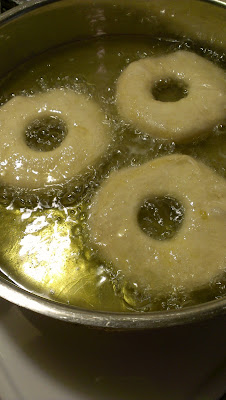
Step One - Heat oil in a skillet on medium-low temperature.  This is important!  If you cook it at too high of a temperature the dough will not cook through in the middle.  Trust me, the extra 3-5 minutes of heating time is worth the wait!!  You'll need it to be about a 1/2 inch deep.

Naughty Donuts
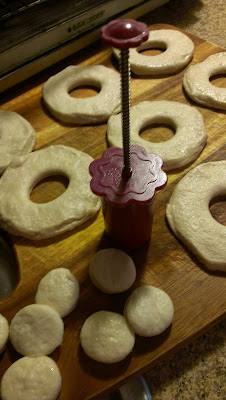
Step Two - While the oil is heating cut circles in the middle of the biscuits.  I used a cupcake plunger, but any circle cutter will do.  Save the donut holes!

Naughty Donuts
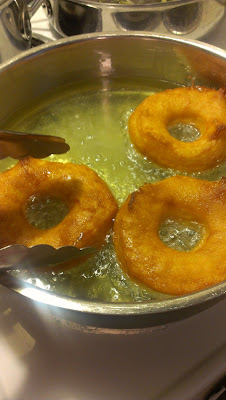
Step Three - Fry the donuts until lightly browned on one side.

Naughty Donuts
Step Four - Flip the donuts with a pair of tongs.

Naughty Donuts
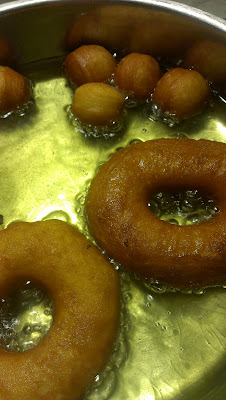
Step Five - Don't forget to throw those donut holes in there!  (Mine flipped themselves, I don't know if yours will too.)

Naughty Donuts
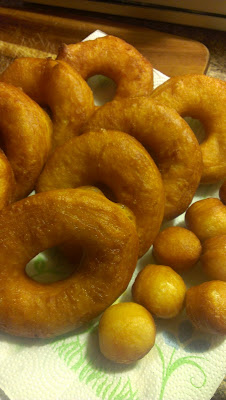
Step Six - Place on a plate that's been covered with paper towels and allow to cool until you can handle them with your hands.

Naughty Donuts
Step Seven - Melt butter in a bowl and prepare a cinnamon-sugar mixture.  I even threw in a DASH of nutmeg.

Naughty Donuts
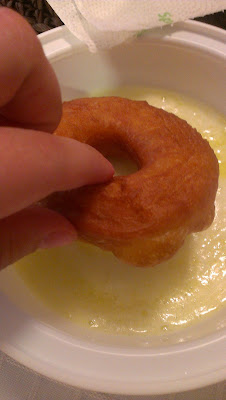
Step Eight - Cover the donut in butter until lightly coated.

Naughty Donuts
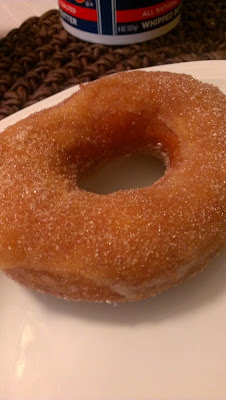
Step Nine - Dip both sides of the donut in the cinnamon-sugar and shake off the excess.

Naughty Donuts
Step Ten - Continue until you're finished and enjoy!

Please don't hate me for this!  I don't want any trash talk in the comment section if you gain any weight from these delish things.